Serial Numbering
This exercise demonstrates the two options that XJTAG offers for associating a serial number with a board:
- User enters serial number - A dialog box to enter a serial number is displayed at the start of testing. The serial number can be entered via the keyboard or a bar-code scanner.
- Take serial numbers from test system - An XJEase function is added to the test system to set the serial number. The serial number could be loaded from a file, retrieved from a server using an external API call or it might ask the operator to enter the serial number and then apply some custom validation to the input.
This exercise is based on the tutorial project created for XJDemo board v4. The starting project for this exercise is installed as a zip file: CompletedTutorial4.zip, as part of the XJTAG installation.
- Extract the zip file CompletedTutorial4.zip to a new, empty directory of your choice.
- Navigate to the Board Test directory.
- In that directory, open the file XJDemo board.xjd with XJDeveloper.
User enters serial numbers
The simplest option for serial number entry is User enters serial number. Every time tests are run, a dialog box will be displayed to allow the user to enter a serial number.
- Click the
 XJRunner Setup screen button under the Run and Deploy header.
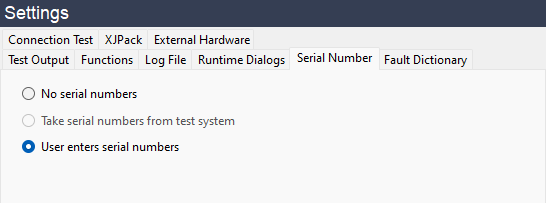
 - In the Settings panel on the right of this screen click the Serial Number tab.
- Click the User enters serial numbers radio button.
- Click on the
 Save button on the main XJDeveloper toolbar.
 - Click the
 Run Tests screen button under the Run and Deploy header.
 - Click the
 Run button.
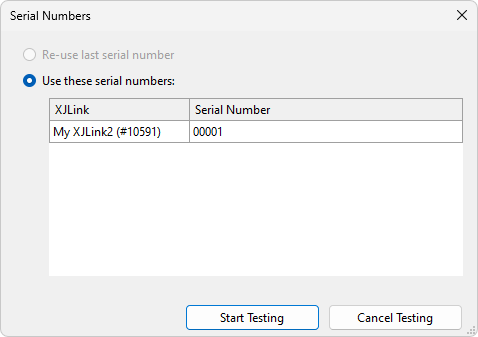
You will be prompted to enter a serial number.
- Enter the serial number 00001.
- Click the Start Testing button to execute the test with the entered serial number.
The serial number is stored in the built in global variable SERIAL_NUMBER. XJEase scripts can access this variable to perform custom operations.
N.B. Setting the SERIAL_NUMBER variable has no effect in its own right. However, if you are generating log files then you will be able to add the serial number to the log file name, which will cause the system to create a separate log file for each board. SERIAL_NUMBER is also available to XJEase functions, and this is commonly used to program the serial number into non-volatile memory on the board.
The next part of this exercise will demonstrate how to configure the test system to accept a serial number as part of an XJEase function.
Take serial numbers from test system
The option to Take serial numbers from test system gives you more flexibility than using the system dialog box described in the previous section of this exercise. Using this option, it is possible to perform validation of the serial number that is entered by a user, extract the serial number from a file on disk or retrieve a serial number from a server using an external API call.
For XJDeveloper to know that the serial number has been set the function that is run must be given a special name, NEW_SERIAL_NUMBER. This function, typically written in a Circuit Code File, must then be added to the XJRunner test list.
- Click the
 Circuit Code Files screen button under the Setup header.
 - Click on the
 Add button above the Navigator panel and select New....
 - Enter SerialNumber as the File name in the New Circuit Code File dialog box.
- Click Save to create the Circuit Code File.
A new Circuit Code File has now been created and is opened for editing. An example function has been added to the file as a starting point for a test function. This will not be used for this exercise.
- Delete the automatically added template function from SerialNumber.xje.
- Paste the following XJEase function into SerialNumber.xje:
/// Validate user-input serial number
///
/// @param result  Returns RESULT_PASS on success
GLOBAL NEW_SERIAL_NUMBER()(INT result)
  CONST INT SERIAL_NUMBER_WIDTH := 6;
  INT cancelled;
  INT retry := MB_BUTTON_OK;
  result := RESULT_PASS;

  DO
  WHILE TRUE
    INPUTBOX("Please enter a " + FORMAT(SERIAL_NUMBER_WIDTH, "%i") + " digit serial number:", "Serial Number", "")(SERIAL_NUMBER, cancelled);
    IF cancelled THEN
      EXIT;
    END;
    IF WIDTHOF(SERIAL_NUMBER) != SERIAL_NUMBER_WIDTH THEN
      retry := MESSAGEBOX("Invalid Serial Number Length", "Board Serial Number", MB_ICON_ERROR, MB_BUTTONS_RETRY_CANCEL);
      IF retry = MB_BUTTON_CANCEL THEN
        EXIT;
      END;
    ELSE
      BREAK;
    END;
  END;
END;
This code will display an INPUTBOX for the user to enter a serial number for the board under test. The value entered is stored in a global string variable, SERIAL_NUMBER. It performs a simple check on the width of the serial number, and if anything other than a 6 character value is entered then it will not be accepted. If an invalid value is entered the test operator will be given the option to retry, in which case the INPUTBOX will be re-displayed. If the user clicks Cancel on either the INPUTBOX or the retry dialog then testing is stopped.
N.B. SERIAL_NUMBER is a built-in variable, and so does not need to be explicitly declared before use.
- Click on the
 Save button on the toolbar for the Circuit Code file editor.
 - Click on the Save button on the main XJDeveloper toolbar.
Having created the function that is used to enter the serial number the next step is to add that function into the XJRunner Test List.
- Click the XJRunner Setup screen button under the Run and Deploy header.
- Click the
 Add Group... button at the bottom left of the XJRunner Tests panel.
 - At the top of the New Test Group window set the Name of this test group to Serial Number Entry.
- At the bottom of the Functions panel click Add Global Function.
- Select the NEW_SERIAL_NUMBER function from SerialNumber.xje and click OK.
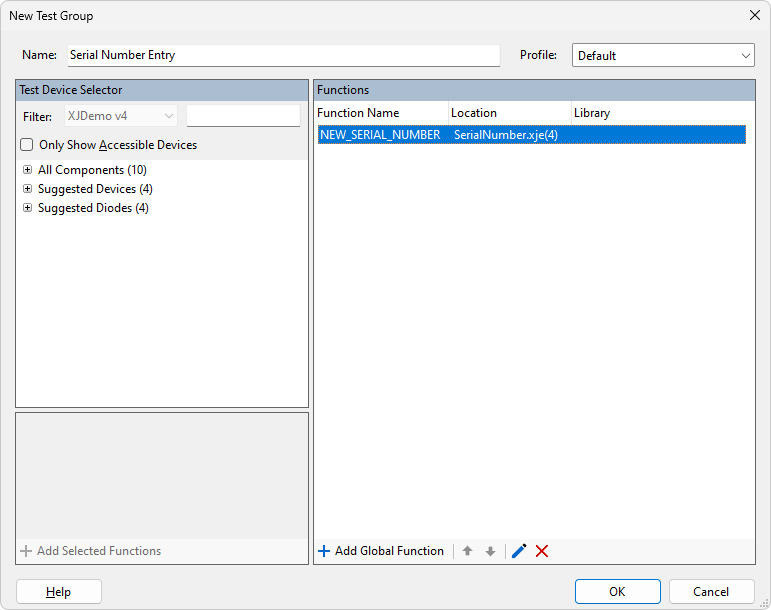
- Click OK to add the test group to the XJRunner Test List.
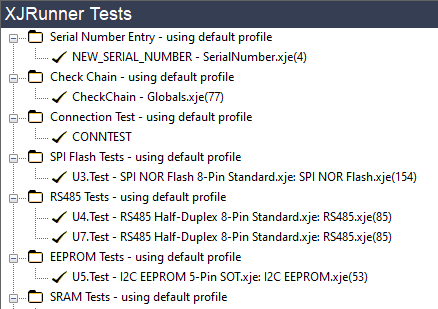
- Click on the Serial Number Entry function in the XJRunner Tests panel.
- Using the
 Up arrow at the bottom of the XJRunner Tests panel, move the Serial Number Entry test group to the top of the list above Check Chain.
The Serial Number Entry test does not have to be called at the beginning of the XJRunner test list and can be placed wherever it is needed in the test program.
- In the Settings panel click the Serial Number tab.
The radio button in the Settings panel labelled Take serial numbers from test system is automatically selected when the NEW_SERIAL_NUMBER function has been added to the XJRunner Test list.
- Click on the Save button on the main XJDeveloper toolbar.
- Click the Run Tests screen button under the Run and Deploy header.
- Click the Run button.
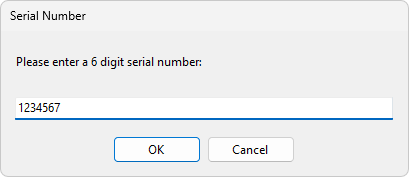
- Enter the serial number 1234567 in the Serial Number dialog box.
- Click OK.
As the value entered was 7 characters it has been rejected and the message box asking if you want to retry entering the serial number has been displayed.
- Click Retry.
- Enter the serial number 123456 in the Serial Number dialog box.
- Click OK.
The test will begin using the entered serial number.
Selecting profile 'All chains'...
NEW_SERIAL_NUMBER passed - ran in default profile (All chains)

Serial number set to 123456 by the test system
Checking the integrity of the JTAG chain.
CheckChain passed - ran in default profile (All chains)

Performing standard Connection Test...
Generating Connection Test data...
Performing Logic Tests (phase 1)...
Performing Logic Tests (phase 2)...
Analysing Connection Test results...
Analysing Logic Tests (phase 1)...
Analysing Logic Tests (phase 2)...
CONNTEST passed - ran in default profile (All chains)
Additional functions can also be performed when the serial number is entered. If the serial number needed to be checked for the proper syntax, code to do this could be added to the XJEase NEW_SERIAL_NUMBER function.
Once a value is assigned to the SERIAL_NUMBER variable it can be accessed from any XJEase function. The Using Enhanced Input/Output Functionality tutorial exercise has an example of writing a serial number to the I2C EEPROM on the XJDemo board.
See Also
XJTAG v4.3.0