BSDL File association
XJDeveloper will display each device found, along with its matched status. At this point XJDeveloper has matched each device on the XJDemo board to a BSDL file in the installed BSDL library. It is recommended to use the copy of the BSDL files in the project directory rather than taking the library version. This is so that any local changes you may make to the BSDL files are not reflected in the library version.
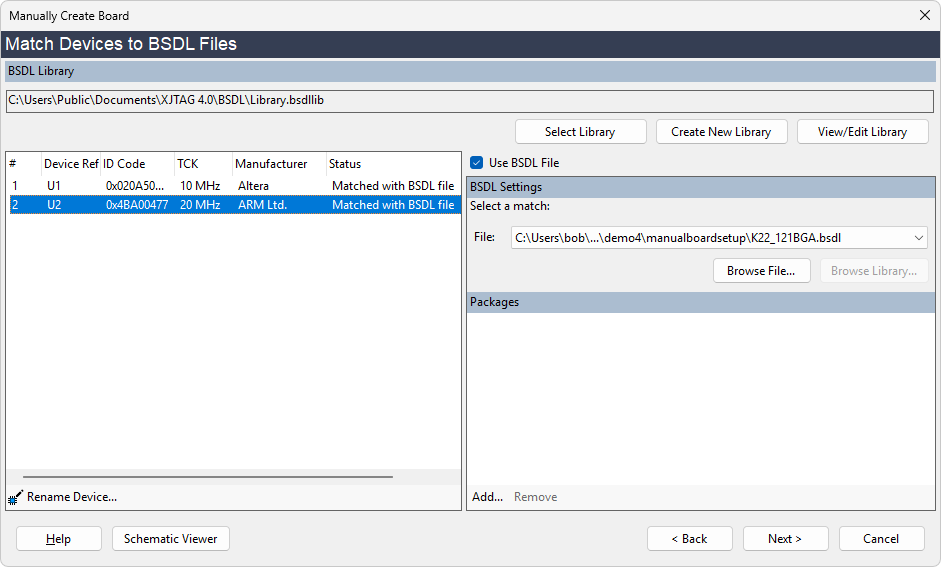
- Select the first device, listed as JTAG1-1, and click the Browse File... button. Select 5M40ZE64.bsd from inside the project directory.
- Click No when prompted to avoid adding this file to the BSDL library.
- Repeat for the second device, JTAG2-1, and select K22_121BGA.bsdl for its BSDL file.
XJDeveloper will generate a unique device reference for each device in the chain. Because you have the schematic for this board it is useful to rename these to the correct device references for your board. This allows XJDeveloper to correctly match BOM information for the device, and to insert correct schematic links.
- Select JTAG1-1 in the list of devices found.
- Click the
 Rename Device... button at the bottom of the dialog, and type U1.
 - Repeat the operation to rename JTAG2-1 as U2
If, when performing this step on your own board, you do not have a BSDL file for some of the devices, you can uncheck the Use BSDL file checkbox for that device. In this situation, XJDeveloper will create a simple BSDL file for the device and store it in the project directory. This BSDL file will not be able to use the functionality of the device but will allow the JTAG chain to operate so that other devices (for which you do have the BSDL file) can be operated.
- Click Next > to move to the next page of the wizard.
XJTAG v4.3.0