Creating a Zip File
A Zip file can be created in XJDeveloper using the File > Export Project > To Zip File... option from the menu bar. The generated file will include all the information from the project with its directory structure, including the XJEase files, schematics, netlist, BOM, layout data, BSDL files, and any External Hardware information. It can be encrypted by assigning a password and is ideal for creating backups and for sharing projects between test developers.
Other files can also be included.
Selecting File > Export Project > To Zip File... from the menu opens a dialog box similar to Figure 7, in which additional files can be added and a password set if required:
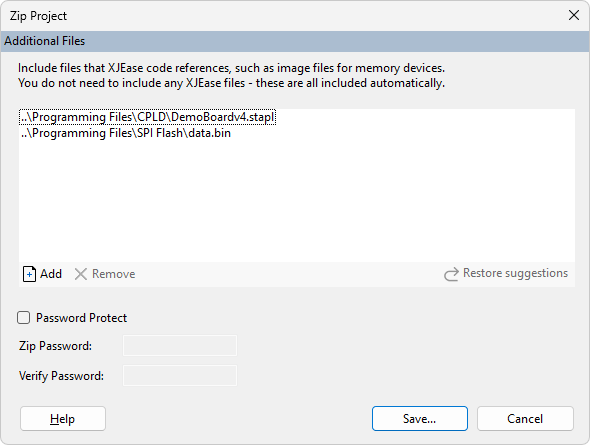
Figure 7: Creating a Zip File from XJDeveloper
These options are described in the following sections.
- This method for creating a Zip file is better than using a Windows application because it will gather the relevant files from wherever they are stored, including from other directories and network drives. This ensures all the files are included.
- When a project uses files located on a different drive to its own, if a matching drive is unavailable when extracting from the Zip file, a directory will be created in the new project folder named with that drive's letter. The relevant files will be unzipped into that directory with a folder structure matching the original drive.
- In that situation, the project is not automatically updated to reflect the new location for those extracted files and will therefore open with errors. You will need to resolve those path issues before continuing.
- If the folder path between a project and any of its files involves crossing the root directory, the project will use absolute paths for those files, even if relative paths are defined in the project. If the Zip file is later extracted to a different machine, it may therefore be unable to locate those files. XJTAG therefore recommends that all files used by a project are stored in a structure below a common folder.
Adding Additional Files to a Zip File
Although all the project files are included by default in the Zip file, you may have other files you want to add such as firmware images for programming. When the Zip Project dialog box opens (Figure 7 above), any files that have previously been saved in the Zip file will automatically be listed in the Additional Files box ready to be used again. If any of them are no longer wanted in the Zip file, they can be removed by highlighting the required file(s) and clicking  Remove. Other files can be added by clicking
  Add and selecting them from the file browser that opens.
Password Protecting Zip Files
To encrypt and password-protect the Zip file, tick the Password Protect checkbox and provide a password.
- When emailing Zip files, using password protection can help improve deliverability
Saving the Zip File
Clicking Save... will open the Save File As dialog. Select the desired storage location and provide a filename.
XJTAG v4.3.0