XJAnalyser Tutorial
This tutorial describes how XJAnalyser works and provides instructions telling you how to perform the described operations.
The tutorial is broken down into three sections:
- Configuration
- This section takes you through the process of using the project setup wizard to configure XJAnalyser to work with the XJDemo board.
- Setting and monitoring pins
- XJAnalyser is a pin-level debugging tool. This section shows you various ways of using XJAnalyser to monitor and set pin values.
- Device programming
- XJAnalyser provides an interface for device programming, using SVF or STAPL files. In this section, you will load a supplied programming file, and see the XJDemo board behaviour change when the device has been programmed.
Hardware and Licence Requirements
This tutorial requires one of XJTAG's XJLink JTAG controllers, with a licence that includes XJAnalyser functionality.
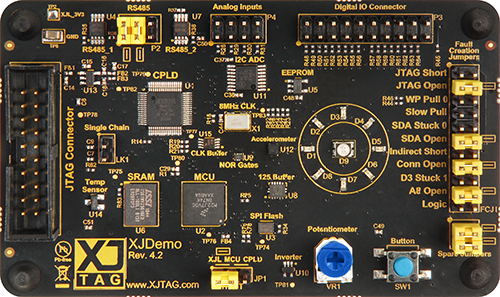
This tutorial also requires an XJDemo v4 board.
The XJDemo v4 board is used with your XJAnalyser system, to guide you through an example of configuring and using XJAnalyser.
XJTAG has produced several versions of XJDemo board over a number of years. The XJDemo v4 board can be identified using the picture below. It has "Rev. 4.2" printed on the front next to the XJTAG logo.
All instructions in the tutorial are highlighted like this.
The tutorial can be navigated via the Previous, Home and Next buttons at the top and bottom of each page in the tutorial.
XJTAG v4.3.0