Debug Connection Test Screen

This screen is particularly useful for allowing the user to debug broken chain errors that occur during the connection test. The connection test drives many changes of value to the nets on the device under test, but will fail to complete if one of the changes it makes breaks the JTAG Chain. The JTAG chain may break for a number of reasons, such as a JTAG device no longer being in JTAG mode, or a power supply device being accidentally disabled.
Because Connection Test can change a large number of nets simultaneously, it is not always clear which change broke the JTAG Chain. The Debug Connection Test screen therefore works by setting nets to a known start state and then changing the value of one net at a time, to another specified value. It then reports any errors.

If the current project uses the Dynamic Chains feature, a toolbar with a Profile selection box is displayed at the top of the screen. The test on this screen is performed using the selected profile. If the current project contains Variants then a variant selection box is displayed at the top of the screen. The test on this screen is performed in the selected variant, using the selected profile.
This screen does not perform a connection test. If the test on this screen does not print any errors, this is an indication that the connection test should complete. It does not mean that the connection test will necessarily pass.
Using the Debug Connection Test screen
If, when you run connection test from the Run Tests screen (or in XJRunner) the test fails with a 'broken chain' error, you should use this screen to find the problem. The default settings are a good initial state for this screen, so first click the  Run button on the toolbar and then examine the output produced. If a broken chain error occurs, look in the test output at which net was being set immediately before the error is seen. It may be obvious why this net was a problem (perhaps it is called 3V3_ENABLE or something similar). If not, repeat the test to see if it fails in the same place every time or is a more random failure.
If no failure is found, or the failure seems random, try using the settings (described below) for this test to try to reproduce the problem reliably.
The Debug Connection Test screen will also find certain issues where a net is not reading the expected value - where there appears to be a conflict, but the JTAG chain is still operating.
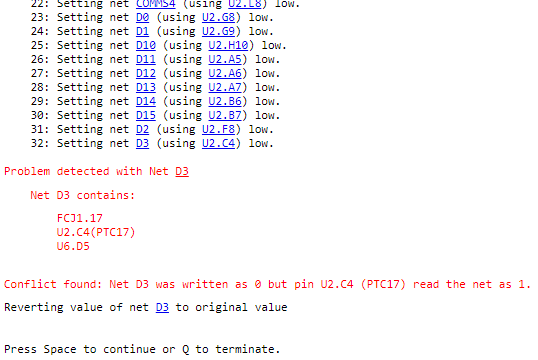
This may be due to a fault in the circuit or a project setup error. However, you can choose to continue through such errors in order to try to find a broken chain issue, and come back to them or use connection test to detect them later. However, if the chain breaks the test will stop, and you will need to find and fix the problem to continue past this point, or disable the Test Step to see if the other steps show any further information that helps you find the problem.
Settings
The test carried out on this screen can be customised to help diagnose errors on a board. These options can be accessed by clicking the  Settings button on the right of the tool bar underneath the test output.
Test Steps
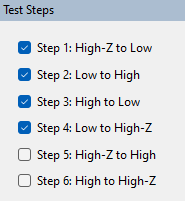
There are 6 steps to the test which can be enabled or disabled, each with a different start and end point for the nets. The enabled steps are run in sequence. If all the steps are enabled, the end state of one step is the start of the next step, meaning the nets only have to all be initialised once. If steps are disabled the nets will be re-initialised together as required in order for the next step to run.
Direction
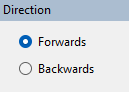
Use the Backwards option to reverse the order in which the nets are set. This can help diagnose problems where the state of a net other than the one being set is important.
Wait
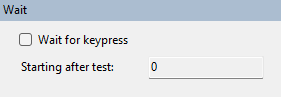
If the Wait for keypress option is set, the user will be prompted to press a key in order to set each net while running the test. This allows the test to be paused while measurements are taken. It also allows identification of errors where the broken chain occurs a certain time after a particular net is set, rather than immediately.
If pressing a key repeatedly to set each net takes too long to get to the net or nets of interest, the Starting after test: field allows you to specify the test number at which the Wait for keypress option should begin. Prior to that test number, the test will run without waiting; after that number it will prompt to press a key once per net.
Test all drivers
Where a net has more than one potential driver pin, ticking the Test all driver pins box will try to drive the net from each driver pin in turn. Otherwise the net will be driven from the same pin throughout the tests on this screen, since this is unlikely to make any difference to whether the JTAG chain breaks or not.
Random
If this option is enabled, when Run is clicked, all nets are initialised to the start state of the first enabled Test Step, after which nets or logic blocks are picked at random and set to random states. This can be useful for soak-testing a board on which the fault is proving hard to pinpoint.
Setting the Seed option allows the user to repeat a test in order to reproduce previous problems.
XJTAG v4.3.0