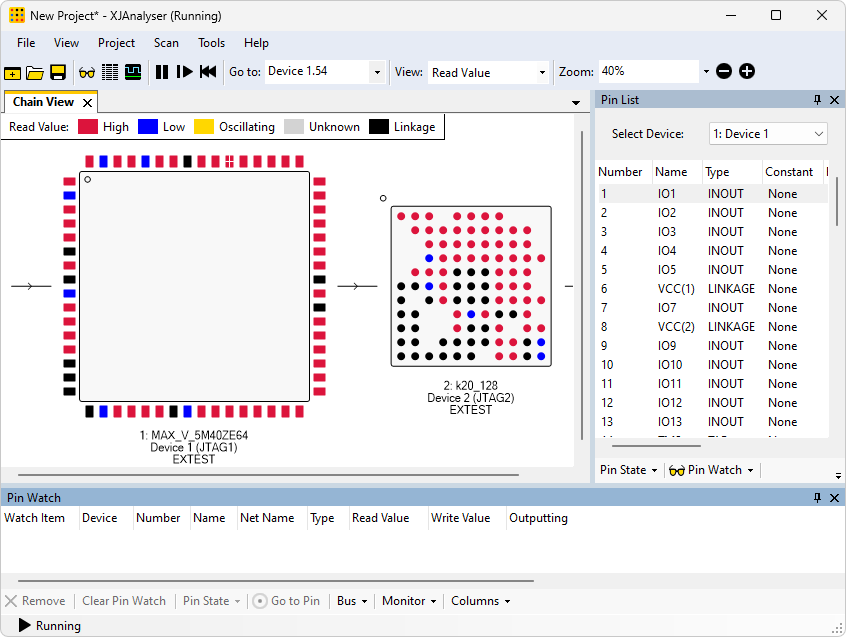
Pin Watch – Monitor and control selected pins
The Pin Watch allows you to track the current state of selected pins and to create busses.
Displaying the Pin Watch
To display the Pin Watch, click  View Pin Watch on the toolbar, or select Pin Watch from the View menu.
- Click View Pin Watch on the toolbar.
Adding Pins to the Pin Watch
To add pins to the Pin Watch:
- Drag one or more pins from the Pin List or Chain View.
- Right-click a pin in the Pin List or Chain View, and click Add to Pin Watch.
- Pins can also be added automatically when the Monitor Changing Pins or the Monitor Conflicts options are selected.
- Drag pin A1 from Device 2, the top pin on the left of the device, into the Pin Watch pane.
- In the Pin List, hold down Ctrl and click pins A8 and B8 to select them both.
- Drag the selected pins into the Pin Watch pane.
Pins can be automatically added to the Pin Watch by right-clicking in the Pin Watch pane and selecting one of the two options:
- Monitor Changing Pins – this option will automatically add any pin whose value changes.
- Monitor Conflicts – this option will automatically add any pin that goes into a conflicting state.
Conflicting pins will be discussed in more detail later in this tutorial.
- If the chain is not already running, click
 Run to start it.
 - Right-click in the Pin Watch pane and select Monitor Changing Pins. All pins that are toggling are added to the Pin Watch.
- Press the push-button (SW1) on the XJDemo board.
Pin 22 of Device 1 is automatically added to the Pin Watch, as it is connected to the button.
- Right-click in the Pin Watch pane and select Monitor Changing Pins again to turn off the feature.
Driving Pins
Pins can be driven from the Pin Watch in the same two ways as they can be driven from the Chain View:
- Right-click a pin to display the Pin Menu, and choose a value to drive the pin to.
- Double-click a pin to toggle its value. If a pin is being read high, double-clicking the pin will drive it low and vice-versa.
Creating a bus
The Pin Watch pane allows you to group pins together to form a bus. You can then drive values onto the bus rather than the individual pins.
To create a bus, right-click a pin in the Pin Watch pane and select  Create Bus. You can then add further pins to the bus by dragging and dropping.
- In the Pin Watch, right-click pin A8 and select Create Bus.
- Expand the bus and see that pin A8 is now in the bus.
- Click pin B8 and drag it into the new bus.
In order to use the bus it is sensible to rename it to reflect its function. In this case the bus allow two of the LEDs to be controlled.
- Stop the chain running temporarily by clicking
 Stop on the toolbar, so that the bus can be renamed.
 - Right-click Bus 1 and select Rename Bus. Name the bus LED Control.
- Restart the chain by clicking Run.
Driving values onto a bus
The bus that you have just created controls two of the LEDs on the XJDemo board. To set the values for all the pins in the bus, right-click the bus and select Set Bus Value from the menu.
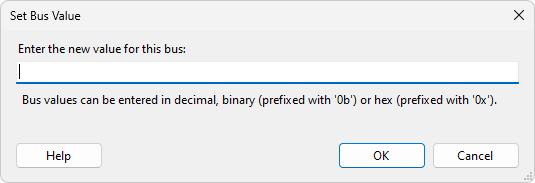
You can enter the bus value in decimal, hexadecimal, or binary: to enter a hex value, prefix the number with "0x"; to enter a binary value, prefix the number with "0b". The value will be converted into binary if necessary and driven onto the pins in the bus.
The value read back on a bus can also be displayed in hexadecimal, decimal or binary. To change the base in which the read value is displayed, right-click the bus and select Display Bus Values As from the menu.
- Right-click the LED Control bus and select Set Bus Value.
- Enter 2, then click OK. You can see that the Write Value column for the bus is now set to 2. You will also see that one of the LEDs has been lit.
- Click the + symbol to the left of the bus name to show all the pins in the bus. You can see that the Write Value column is set to High and Low.
- Set the value of the bus to 1. You can see that the Write Value for the bus has changed to 1, the Write Value for the pins have changed to be Low and High, and now the other LED is lit.
XJDemo v4 lights its LEDs by driving low and turns them off by driving high. Setting a bus value of 3 will therefore turn off both LEDs, and 0 will light both.
Go to Pin
To highlight a particular pin in the Chain View, right-click any pin in the watch and select  Go to Pin.
XJTAG v4.3.0