User Management
We will now look at how user management works in XJRunner.
- Click on the
 User Management button.
The User Management dialog will open.
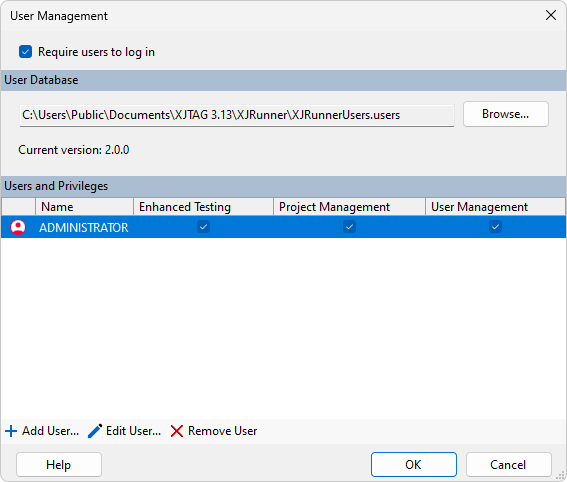
All users can run the default tests (as set up in the Project management screen), but users can have additional privileges, which are enabled and disabled through the user management dialog. The default user, ADMINISTRATOR, has full privileges.
- Enhanced Testing Privileges - Include the ability to edit the test list from the default set (e.g. there may be extra debugging tests available, to pinpoint problems with a board), the ability to loop tests multiple times and other debugging features available via the Enhanced Testing dialog.
- Project Management Privileges - Include various ways to edit/update projects using the Project Managemenet dialog.
- User Management - The user can create users and modify their privileges and passwords using the User Manager dialog.
We will now create a basic user - one with no additional privileges.
N.B. All new users have the Layout Viewer and Schematic Viewer privileges enabled by default.
- Click
 Add User....
The Add New User dialog will appear.
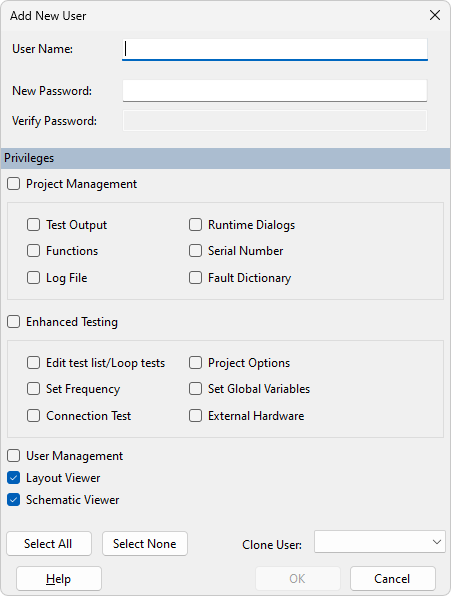
- Enter Basic as the user name.
- Enter a password for this user in both Password boxes. Click OK.
The new user will appear in the list of users on the main User Management screen.
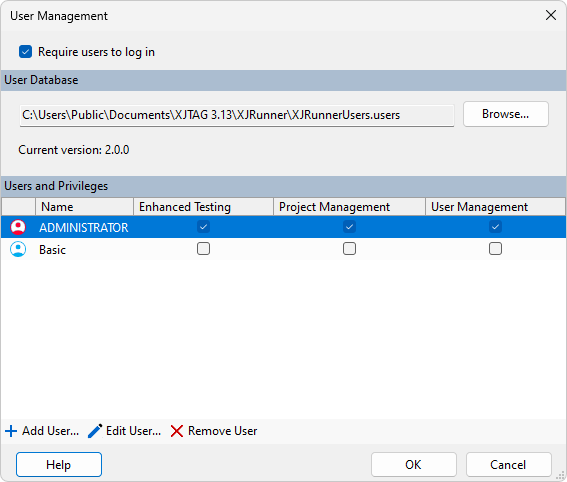
You can see to the right of the user name that the new user has no extra privileges.
We will now change the administrator password. Choose a password that you can remember.
- Click on ADMINISTRATOR in the user list.
- Click
 Edit User....
The Edit User dialog will appear.
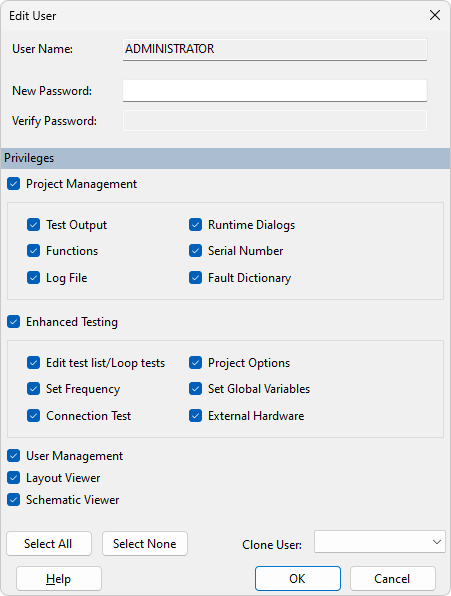
- Enter the new password in both Password boxes.
- Take note of the new password you have chosen.
- Click OK on the Edit User dialog.
- Click OK on the User Management dialog.
- Click OK when prompted to save changes to the users database, this will then close the User Management dialog.
XJTAG v4.3.0