Examples - Using the XJIO board
N.B. It is assumed that you have completed the XJDeveloper Tutorial supplied with your XJTAG development system before working through this example.
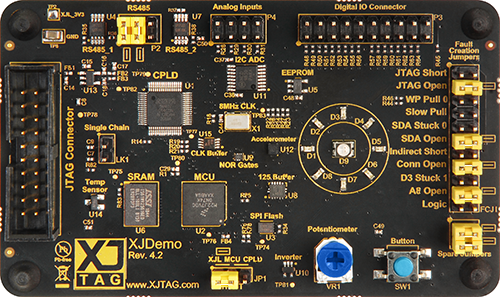
This example takes you through the process of using the XJIO board to extend the testing of the XJDemo board. Please make sure you have an XJDemo v4 board as shown here.
Click here to begin working through the example.
Why use an XJIO board?
The data pins of the connectors P3 and P4 on the XJDemo v4 board are not tested for open-circuit faults when the standard tests supplied with XJTAG are run. By adding connections from these connectors to the XJIO board you allow XJTAG to test not only for short-circuit and stuck-at faults but also for open-circuit faults.
XJTAG v4.3.0