Categorising the Changes
The aim of this process is to map as many categorisations as possible to the new revision. The Revisions wizard will complete much of this process, meaning that many of the changes will be categorised automatically, especially if they are minor changes such as reference designators or resistor values. That said, there are likely to be a number of places where some user input is required. The Revision Checklist will guide you through this process as quickly and easily as possible, giving you the information you need to ensure all the changes are correct.
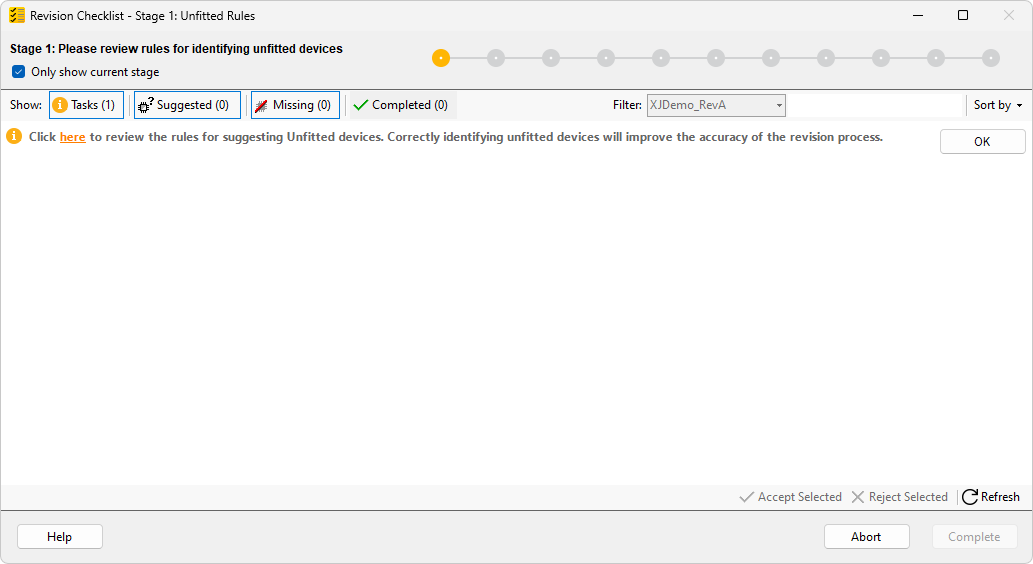
Figure 7: Overview of the Revision Checklist
There are several stages in the Revision Checklist, although the user interface is the same for all of them. Across the top of the window you can see the progress bar. As each stage is completed, the bar will advance, however in a few cases you may find that you're taken back to an earlier stage. This isn't a mistake in the setup – you're still making progress, it just means that the wizard has been able to identify something which has given access to a device or net that should have been included in an earlier step.
Underneath the progress bar, you can see the Show: options. These allows you to toggle various different categories of item, either showing or hiding them as you wish:
- Tasks show information from Revisions which may ask you to do certain things, such as to check through the assignments that the system intends to make.
- Suggested items are those where the system needs to have the assignment reviewed.
- Missing shows any devices which were in the original project, but have been removed from the revised version.
- Completed items are initially ones where the system has a very high confidence level over where they should be assigned, and so has automatically configured them. As you assign more nets or devices, working through each stage, these items will be added to the Completed section.
- By default, this view will only show items for the current stage. If you wish to see everything, you can untick Only show current stage. This allows you to check previous stages or fix mistakes.
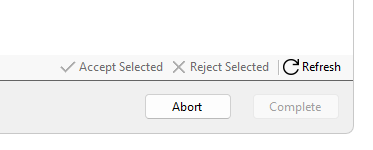
Figure 8: Additional Actions
At the bottom of the window, you have buttons to Accept Selected or Reject Selected items. You can select multiple items in the list by using the standard Windows shortcuts – hold Shift to select a range, hold Ctrl to select multiple individual items or press Ctrl + A to select all items. If the selection has items which can be accepted in multiple ways, a dropdown arrow will be displayed, turning the button into a menu.
There is also a button to Refresh the wizard if you have made any changes outside it. Refresh must be used to tell the wizard to analyse the board again taking these changes into account, potentially allowing it to find more proposed device categorisations, or find more devices which are now accessible.
Matches and Match Scores
As you progress through a Revision, you will see a number of different lists of circuit elements (devices or nets), identifying which ones Revisions believes to be matches, as shown below in Figure 9. A match is a circuit element in the new version which Revisions believes to be the same as an element in the previous version. These will be shown with the confidence level of the match as a percentage (1) – this is derived from a number of factors, including comparing BOM fields, pin counts and net topology which are displayed in a tooltip if you hover over the score. You can check the Revision Device Matching Algorithm section of the help for more information on this process.
Elements with a very high match score will be automatically accepted. If you wish, you can check these by turning on the Completed filter, but this isn't typically necessary.
In general, because the list is ordered by confidence score, devices with similar reference designators and very similar match scores will tend to cluster together. After doing detailed checks on one or two in a cluster, it's generally very quick to check that the rest of the cluster fit the same pattern – similar devices with similar scores will often have those scores for the same reason. This allows you to run through a large number of devices in a short time.
The entry in the list also tells you the old and new net names or device reference designators, and allows you to get more information to help you decide what to do with the entry:
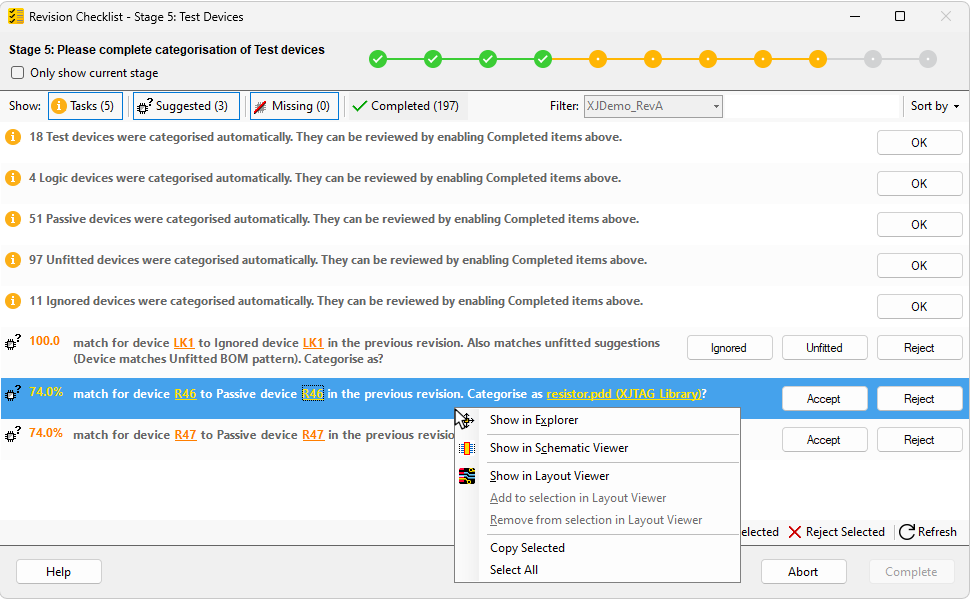
Figure 9: Information on matches
- To show the revised device in Explorer, click the first device reference link in the line.
- To show the original device in Explorer, click the second device reference link (the link followed by "in the previous revision").
- Opening both of these together allows you to easily compare them so you can confirm whether they are a proper match between revisions.
- Right-clicking will show further options. If you right-click a device reference link and choose one of the Show in (...) items, the appropriate view (Explorer, Schematic, Layout) will be opened for whichever project the link referred to. If you right-click anywhere else on the message, then these items will display views for both projects in separate windows. These different views give you different ways to examine the device.
- To view the proposed file for the component, click the final link in the entry.
- Any window showing information about the original project will have a grey banner; a window showing data for the new revision will have a yellow banner.
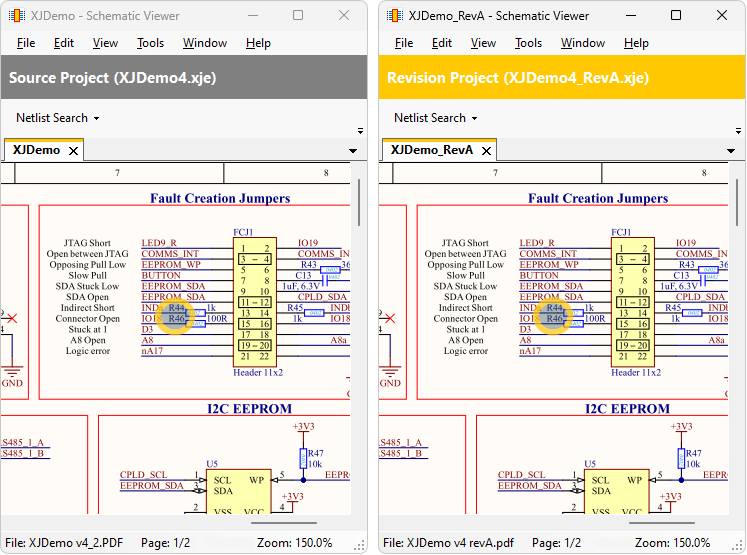
Figure 10: Original and revised schematics
These views can also be opened from the View menu in XJDeveloper:
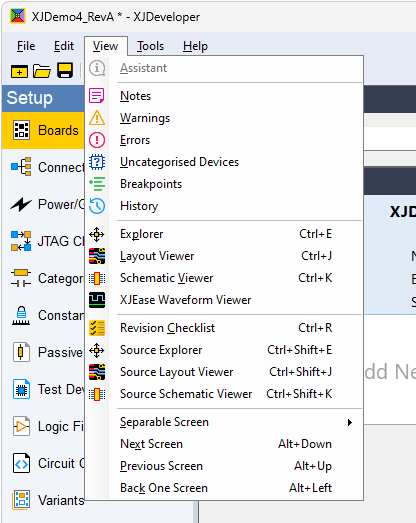
Figure 11: Project views
Finally, at the end of each row, you will have a number of actions, as shown in Figure 12 below, depending on the analysis:

Figure 12: Action buttons in the Revision Checklist
These may allow you to:
- Accept or Reject any matches.
- Mark a circuit element as Unfitted or Ignored.
- For tasks, use the OK button to confirm that you have completed the requested actions.
- If the Completed filter is active, completed items will be displayed with an Undo button, which allows you to bring that item back into the to-do list.
Stages of Categorisation
The Revisions process is split into a number of stages to help you run through it in a logical order, without missing anything. All of these stages are equivalent to the steps that would have been worked through when configuring a project in XJDeveloper, however because the system has a previous version of the project to use as a template, a lot of the devices and nets will have been identified already, making the process much quicker and easier for you.
- Unfitted Rules - this stage involves checking how unfitted devices are identified, and ensuring that the rules are correct for the BOM data used for this revision.
- Power Nets - this stage allows you to verify all of the power and ground nets on the revised version have been categorised correctly.
- JTAG Chain - ensure that XJDeveloper knows what JTAG devices are in the revision, and how they are linked.
- Device Connections - check all the external connections between devices.
- Test Devices - check that devices associated with XJEase test device files have been correctly categorised.
- Logic Devices - ensure that all logic in the circuit has been properly categorised.
- Passive Devices - ensure that all devices that make a connection between nets are properly categorised.
- Unfitted Devices - ensure that all parts which aren't present on the circuit board in the revised version have been properly identified.
- Ignored Devices - ensure that any devices that are safe to ignore during testing have been identified.
- Invalid References - check the project for references which couldn't be automatically updated.
The next section of this guide runs through each one of these stages in more detail and includes links to the relevant parts of the documentation for setting up a board.
Correcting Mistakes
During the revisions process, there is no Back button in the wizard, however if you realise you have made a mistake, you can show all of the assignments you have made so far by unticking Only show current stage at the top of the dialog (1). This, combined with the Completed filter (2) allows you to make any necessary corrections even after you've moved on. Click Undo (3) by any entry that needs correcting – this will take you back to the relevant stage of the Revisions wizard.

Figure 13: Seeing previous stages
- Corrections can also be made by recategorising the net or device inside XJDeveloper, and this can be done at any stage, including after you've completed the revisions process. For more information, please see the XJDeveloper Help, selecting the appropriate screen for the device you're modifying. If you make any changes outside the wizard, remember to click the Refresh button.
Saving and Resuming
Once you've created the new project and started the revisions wizard, you can save the project from the main XJDeveloper window as normal; if you then close XJDeveloper and reopen the project later, the revisions wizard will resume.
XJTAG v4.3.0