Using XJRunner Integration in TestStand
The TestStand examples that demonstrate how to use XJRunner Integration in .NET modules can be found in \XJIntegration .NET Examples\XJDemo V4 Examples\XJRunner\TestStand\DotNET. The sequence file XJRunner .NET Integration.seq, which comes as part of the standard XJTAG installation, is shown in Figure 12 below. In the below example, an LED is tested by calling the standard XJEase test. The sequence of steps is as follows:
- Open a RunnerProject and initialise an XJLink (1 & 2)
- Create an object of the Runner class (3)
- Run tests:
- Configure the Runner ready to test:
- Load the Test Collection (4)
- Select the test to be run from the list of available tests (5)
- Run the test (6)
- Display result (7)
- Configure the Runner ready to test:
- After finishing with that particular board, dispose the Runner object (8)
- After completing all testing that uses that XJLink, dispose the XJLink object (9)
- After completing all testing that uses that project, dispose the RunnerProject object (10)
- When ready to shut down, perform a system close to ensure all system resources are released (11)
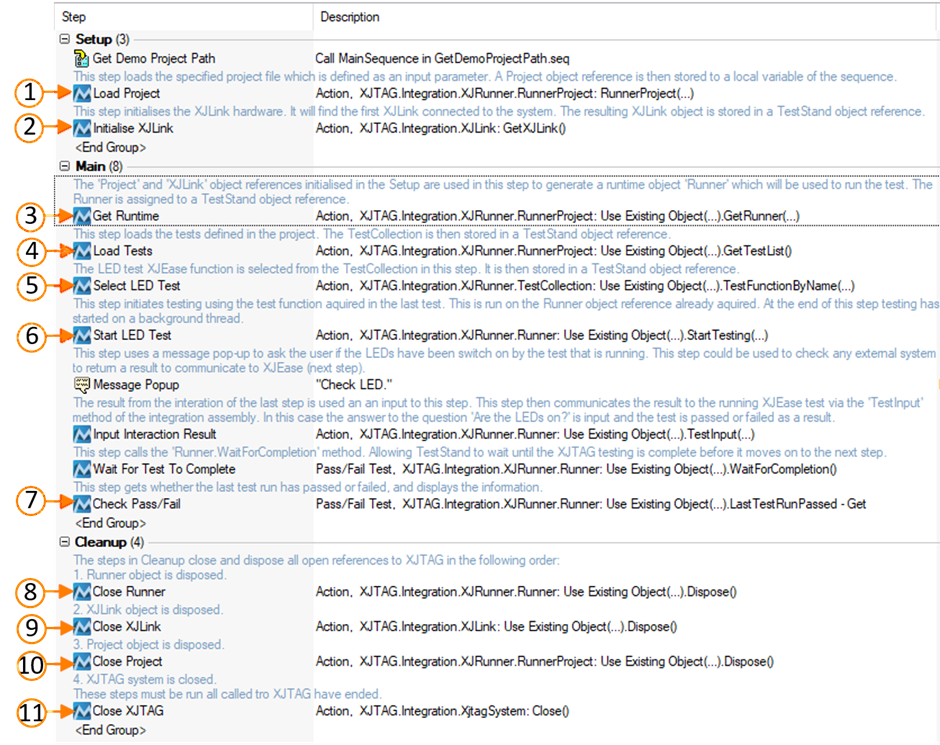
Figure 12: TestStand Using XJRunner Integration in .NET Modules
XJTAG v4.3.0