XJRunner Tutorial
This tutorial introduces you to XJRunner, using an XJDemo board supplied by XJTAG.
It contains the following sections:
- Opening the Application
- This section describes opening the application, and optionally logging in if required.
- Starting Out
- This section explains the process of opening an XJRunner project.
- Running Tests
- Once you have a project, you can move on to running tests on a board. This section explains the basics of running tests.
- Enhanced Testing
- Users with Enhanced testing privileges have access to more complex testing capabilities. This section explains what they are and how to use them.
- User Management
- This section explains the different levels of access available to users, and takes you through the steps of changing the default password for XJRunner and of creating a new user.
- Basic Users
- Basic Users have minimal access. This section covers how they can use XJRunner.
Hardware and Licence Requirements
This tutorial requires one of XJTAG's XJLink JTAG controllers, with a licence which includes XJRunner functionality.
This tutorial also requires an XJDemo v4 board.
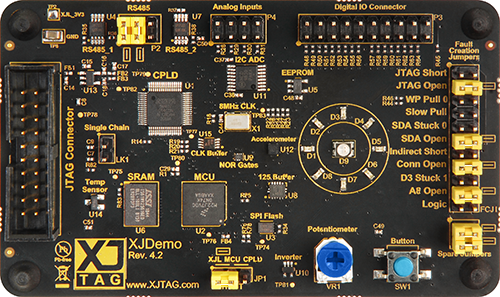
The XJDemo v4.2 board can be identified using this picture:

The board has "Rev. 4.2" printed on it, next to the XJTAG logo.
All instructions in the tutorial are highlighted like this.
The tutorial can be navigated through the Previous, Home and Next links at the top and bottom of each page in the tutorial.
XJTAG v4.2.3
