Using XJAnalyser Integration in TestStand
The TestStand example that demonstrates how to use XJAnalyser Integration in .NET modules (Figure 16) clearly shows the sequence to be followed when using XJIntegration. It can be found at \XJIntegration .NET Examples\XJDemo V4 Examples\XJAnalyser\TestStand\XJAnalyser Integration.seq. In this example, an LED is being switched on and off by taking direct control of the pin of the JTAG device that drives it. The sequence of steps is as follows:
- Initialise an XJLink (1)
- Open an AnalyserProject (2)
- Create an object of the ChainRunner class (3)
- Run tests:
- To control a pin:
- Get the Pin object for the required pin (4)
- Start the chain running (5)
- Set the Pin so that it continually changes state (6) or set it high or low (7)
- To control a pin:
- After finishing with that particular board, dispose the ChainRunner object (8)
- After completing all testing that uses that project, dispose the AnalyserProject (9)
- Dispose the XJLink object (10)
- When ready to shut down, perform a system close to ensure all system resources are released (11)
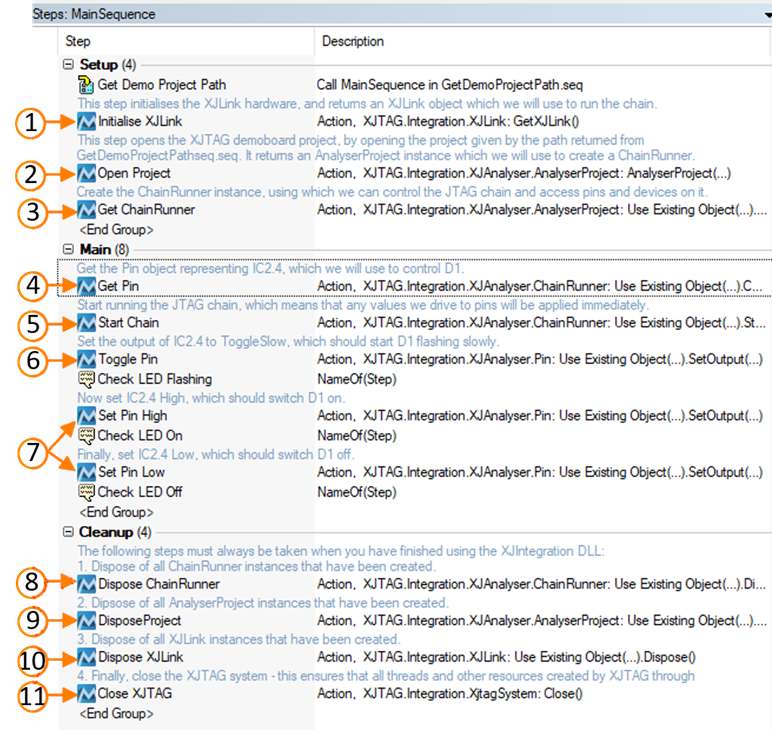
Figure 16: Using XJAnalyser Integration in .NET modules with TestStand
Users are encouraged to use these modules in their own code.
XJTAG v4.3.0