Adding a manual device
It is possible to manually add non-JTAG devices to the project, and categorise those devices. This step will cover creating passive devices. Later steps in this tutorial will cover creating devices to categorise as logic or test.
The passive devices we will add are the pull resistors for the I2C bus on U1. These are resistors R9 and R10, attached to U1.5 and U1.7.
- Click the
 Connections screen button under the Setup header, then go to the Manual Devices tab.
 - Click on the
 Add... button in the toolbar at the bottom of the screen.
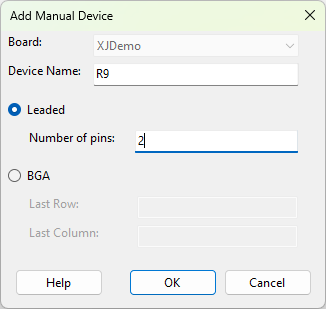
 - Set the Device Name to R9 to match the device reference in the schematic. Ensure the Leaded button is selected and set the Number of pins to 2.
- Click OK to add the device.
- Repeat the process to add another 2-pin device called R10.
At this stage, the devices have been added onto the board, but are not connected to anything. Before we can do anything useful with the devices, we must specify connections for their pins.
The pins are pull-up resistors and so will need to pull to a power net. We already categorised some pins on power nets earlier in this tutorial and any of these will do. U1.6 will be used in this example.
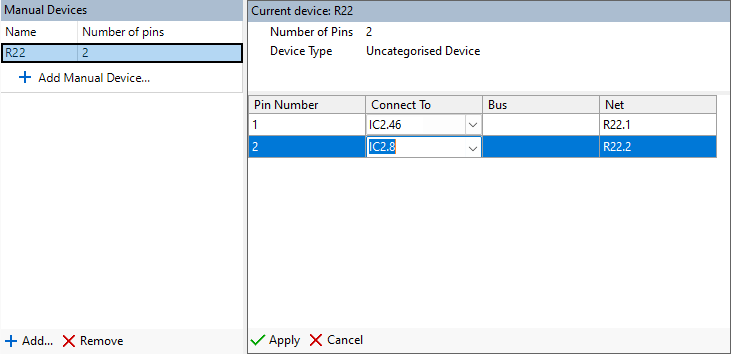
- Select the R9 manual device in the Manual Devices list.
- On the right side of the screen, in the Connect To column, type U1.5 next to pin 1 and U1.6 (or any other pin on a power net) next to pin 2.
- Click the
 Apply button at the bottom of the panel.
 - Repeat the process for the R10 manual device, connecting pin 1 to U1.7 and pin 2 to U1.6.
We need to categorise these new devices as resistors before we run the Connection Test again.
- Click the
 Categorise devices screen button under the Setup header.
 - Ensure that the Resistors header in the Uncategorised Devices list is expanded.
- Click the + next to the Suggested Resistors - Pull subheader.
- Categorise R9 and R10 as pull resistors by dragging them onto the Passive option in the Assign As panel.
- In the Assign Device As Passive dialog check that pull-resistor.pdd is selected and click OK
- Click the
 Run Tests screen button under the Run and Deploy header.
 - Click the
 Run button to run the Connection Test, saving when prompted.
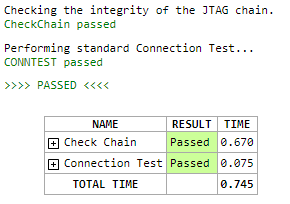
Connection Test still passes, but now it is also checking the pull-up resistors. You can explore this further by looking at the Test Coverage statistics for the newly added resistors.
XJTAG v4.2.5