Reviewing a Variant's Test Coverage
Test coverage statistics are only shown for the root project. Therefore, to view a variant's test coverage, the project must first be exported to create a standalone project.
To do this, select the required variant and click the Save As... button at the bottom of the Variants list:
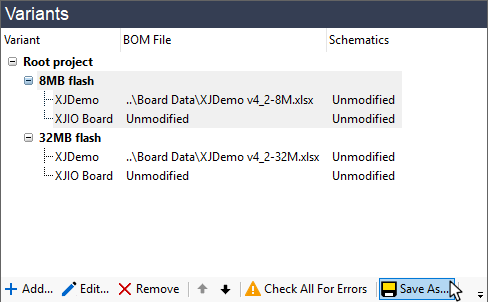
Figure 26: Saving a Variant as a Standalone Project
This will open a Save Variant Project As dialog box similar to Figure 27 below. Use Browse... to choose the top-level directory in which the new project is to be stored and provide a name for the project in the Project Filename box.
- During the project's development stages, it may be best to save the variant into the same directory as the root project. This will allow any changes made to the root project to flow automatically inito the variant. However, once the test project is fully debugged, you may want to separate the projects by saving the variant elsewhere to avoid someone inadvertently causing changes to the variant project. Refer to the Help system's entry on Save Project As for more details.
Any additional files such as pictures and programming images that already exist in the root project or variant will automatically be added to the new project and will be listed in the Additional Files box. If necessary, files can be omitted from the list by using the Remove button, and others can be included by using the Add button.
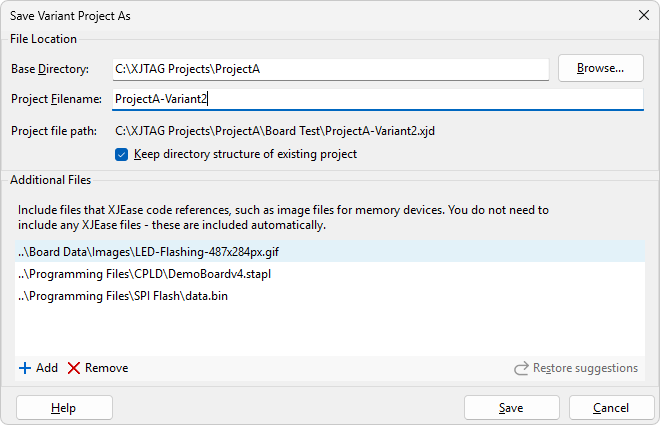
Figure 27: Providing Details for a Standalone Variant Project
Clicking Save will create the standalone project. It can now be opened and its test coverage statistics reviewed.
XJTAG v4.3.0