Add/Edit FTDI Details Dialog
When you add an FTDI pin mapping to your project, the Add FTDI Details dialog will appear. It allows you to specify which FTDI hardware the pin mapping will describe. It is opened by selecting FTDI from the Add XJLink Type dropdown menu on the Pin Mapping tab.
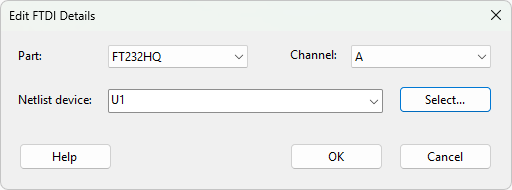
The dialog contains the following fields:
- Part - the FTDI part being used as the JTAG controller. This can be a C232HM cable or one of the supported package variants of the FT232H, FT2232H and FT4232H chips (e.g. FT2232HL, FT2232HQ or FT2232H-56Q).
- Channel - the channel of the FTDI part to use. The channels available depend on the selected part.
- Netlist device - the device in the circuit that corresponds to the FTDI chip. A device can be entered by typing its reference or by clicking the Select... button. This field is disabled when the C232HM is selected, as the cable is not a device on the circuit.
The OK button is only enabled when the details are valid. An error will be indicated if the selected netlist device has already been categorised as a JTAG device, or if it does not have the pins expected for the selected part. If the device has been categorised, its categorisation will be changed to JTAG Controller.
The same dialog, titled Edit FTDI Details, is opened by the Edit FTDI Details button on the toolbar to modify the details of an existing FTDI pin mapping. When edited, the pin assignments are retained as far as possible. Assignments are lost if the new part has fewer pins in the channel, and JTAG signal assignments are removed if the new channel does not support JTAG (channels C and D of the FT4232H).
N.B. For boards that were created without a netlist there is no netlist device to choose, so the Edit FTDI Details button instead opens the Select FTDI Channel dialog, which only asks for the channel to use.
XJTAG v4.3.0