Stage 2: Power Nets
The next part of the wizard involves approving which nets have been categorised as power or ground. Revisions will attempt to assign as many of these as it can automatically, but there will typically be a few which need confirming.
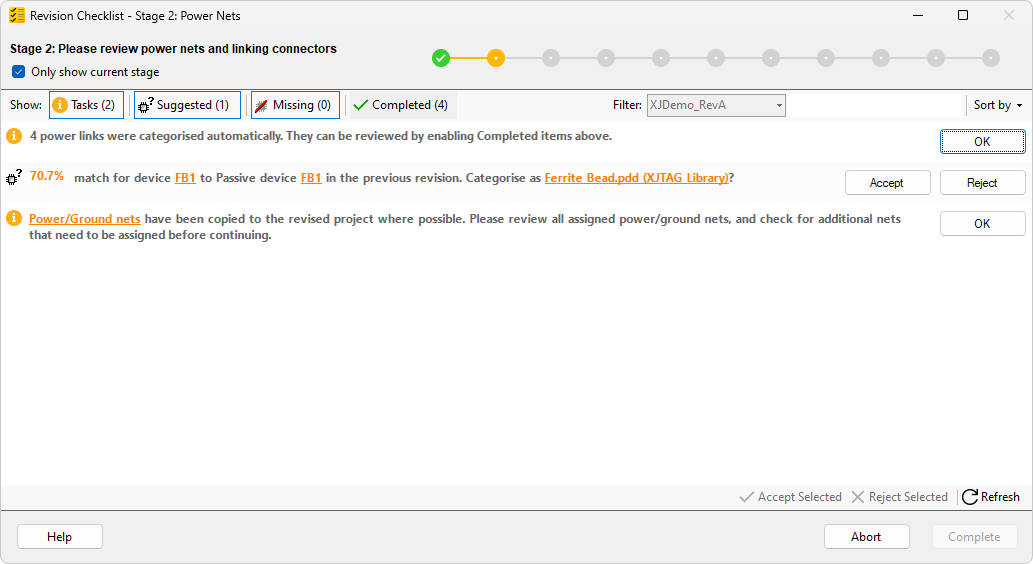
Figure 15: Power Nets
As shown in Figure 15, the Power Nets stage can also include resistors and ferrite beads which link power nets.
The wizard has automatically copied across all net categorisations with very high match scores – if you wish, these can be reviewed by turning on the Completed filter. Once you're happy with these categorisations, turn off the filter and click OK to dismiss the message. Next, confirm that the suggested categorisations for devices are correct – in the example above, two resistors have been found, but the wizard needs confirmation that these have been correctly identified. Finally, click the link to open the Power/Ground Nets screen in XJDeveloper. Note that this will open in the main XJDeveloper window, not in the Revision Checklist dialog:
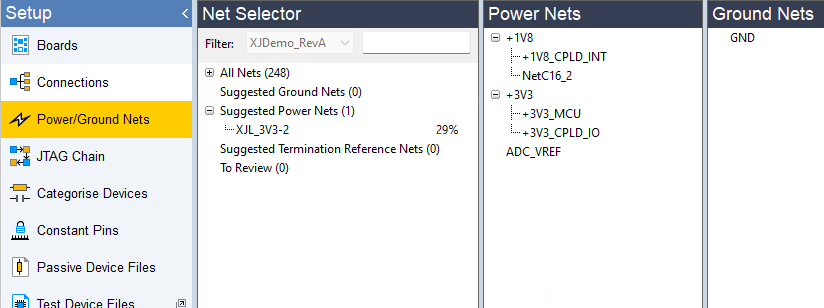
Figure 16: Power and Ground Nets Screen
This will show you all the nets which have been assigned, plus any which have been identified as potential new power or ground nets. From this screen, you can assign these as appropriate. Once you've done this, return to the Revision Checklist and click the Refresh button to tell the Revisions wizard to re-analyse the project with these changes included. You can now click OK in the wizard to mark that task complete.
- The chapter on power, ground and termination nets has more information on how to configure net assignment using XJDeveloper.
The wizard will automatically move on to the next stage once all items in the list have been dealt with.
XJTAG v4.3.0