Controlling the chain
To start running scans on the JTAG chain, click  Run on the toolbar. Alternatively, select Run from the Scan menu, or press F5.
You can also single step the chain.
- Click Run on the toolbar to start running scans on the chain.
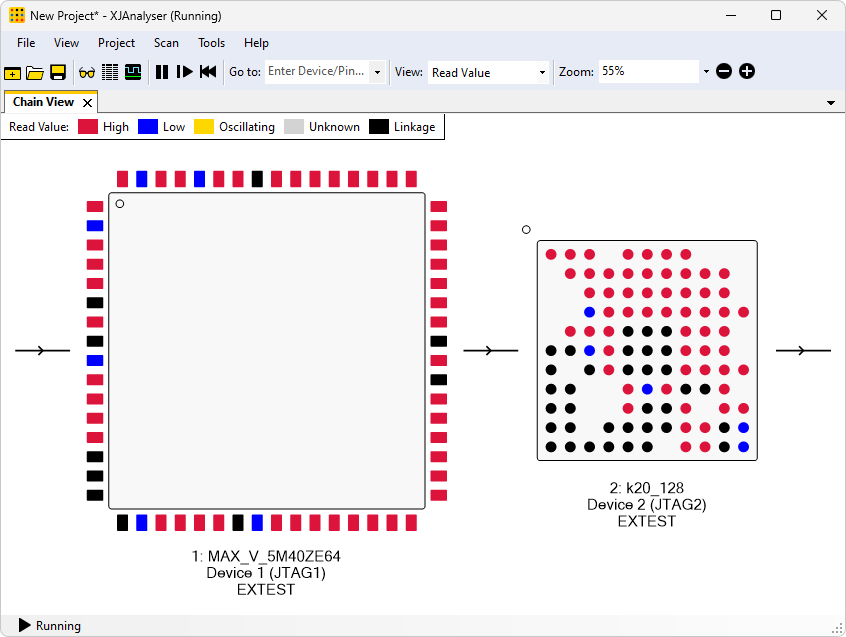
XJDemo v4 board with JTAG chain running
Monitoring Pins
The colours of the pins in the Chain View provide the easiest method of monitoring their values. When the value of a pin changes, the colour also changes to reflect its new state.
Controlling Pins
When you start the chain, all the pins are in their default state, with output disabled where possible. However, you can use XJAnalyser to drive pin values, to implement your tests.
There are two methods of setting pin values:
- Right-click a pin to display the dropdown Pin Menu, and choose a value to drive the pin to.
- Double-click a pin to toggle its value. If a pin is being read or driven high, double-clicking the pin will drive it low; if a pin is being read or driven low, double-clicking will drive it high.
For larger chains where it is not possible to see all the pins at the same time, the Go to tool can be used move to and then highlight a specific pin. You can directly enter the device or pin that you want to show into the Go to box on the toolbar where it says Enter Device/Pin. Using Ctrl + G or selecting Go to in the View menu will take your cursor to the Go to tool.
To go to a specific device, type the name of the device (such as Device 1) in the Go to box. To go to a specific pin, enter the device name, followed by a "." and then the pin name.
- Click the View menu and select Go to.
- Type Device 1 into the Go to box, and press Enter. Device 1 will now be highlighted in the Chain View.
- Change the search text in the Go to box to Device 1.54, and press Enter. Pin 54 on Device 1 will now be highlighted in the Chain View.
- Right-click pin 54 to display the pin menu for that pin.
- Select Set Low from the dropdown list.
You can see that the pin colour has changed, which shows that the value read on that pin has changed. There is also a white cross drawn through the pin – this indicates that the pin is being driven. The effect of driving this pin can be seen on the XJDemo board, as it controls one of the LEDs, which is now lit.
- Double-click the LED control pin.
Double-clicking the pin has toggled the value driven by the pin. Looking at the XJDemo board, you can see that the LED is no longer lit.
XJTAG v4.3.0