Stage 3 – Matching BSDL files
The final stage in configuring XJAnalyser to work with the XJDemo board is matching the devices in the JTAG chain with BSDL files which describe the implementation of JTAG on those devices.
Using the power and pin mapping settings you specified in the previous step, XJAnalyser has automatically scanned the XJDemo board and read out an ID code for each device in its JTAG chain.
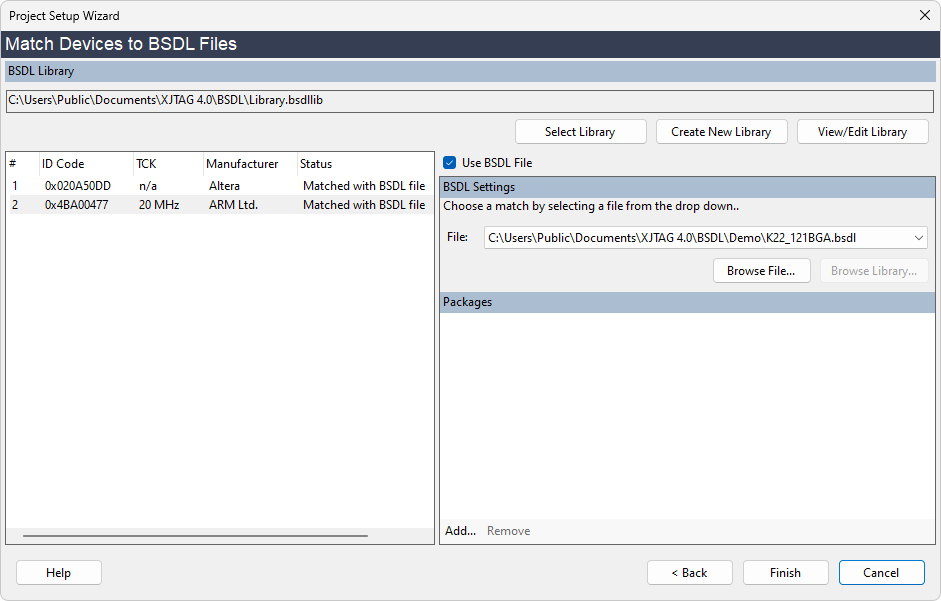
For the XJDemo board XJAnalyser has been able to automatically match the ID codes read from the board to BSDL files by looking in its BSDL file library.
When installed, the BSDL library only contains BSDL files for the JTAG devices on the boards supplied by XJTAG. Additional files can be added directly by clicking View/Edit Library. If a BSDL file is added to a project by selecting a file from disk, XJAnalyser will ask if that file should be added to the library.
BSDL files can be downloaded from the chip manufacturer's website.
XJAnalyser now has all the information it needs to control and monitor the pins on the devices in the JTAG chain.
- Click Finish to complete the setup and start using XJAnalyser.
You will now see a representation of the JTAG devices on the XJDemo board.
You may at this point see a pop-up warning you that there are errors or warnings in the project. This is due to a manufacturer warning in one of the BSDL files. Generally you should read such warnings but in this case it is not relevant to this tutorial.
- Click No in the Errors/Warnings Found pop-up dialog.
XJTAG v4.3.0