The Add Board Dialog
Board information is added to an XJDeveloper project from the Add Board dialog box (Figure 2).
This is launched either by clicking the Add New Board... tile in the main area of the Boards screen, or by clicking the  Add New... button at the bottom of the Boards screen:
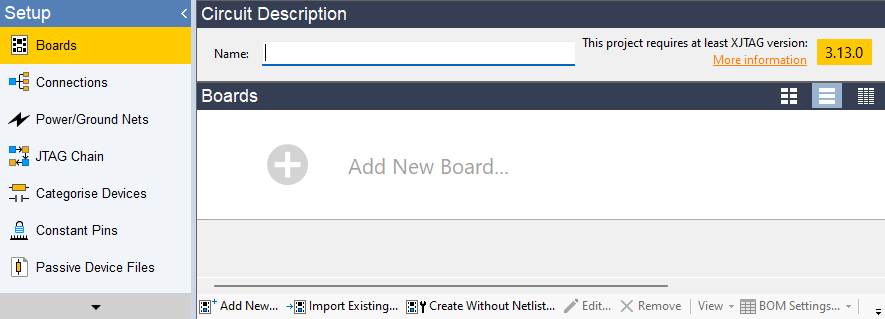
Figure 1: Launching the Add Board Dialog Box from the Boards Screen
Each board requires a name. However, the Name box can be left empty at this stage because it will be automatically filled with the netlist name when one is imported. This can be useful because it will normally show which revision of netlist has been used. In multi-board systems, it is often helpful to provide a name that is more descriptive of the particular board (e.g. processor board), in which case it can be entered now. An optional description of the board can also be added as shown in Figure 2:
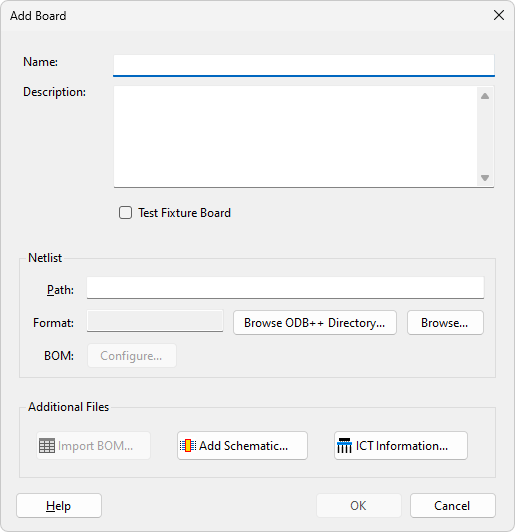
Figure 2: The "Add Board" Dialog
The next step is to use the other sections of this dialog box to import the design files and to map relevant BOM fields to XJDeveloper's data types.
- Information for a board can be edited at any time within the Boards screen – see Editing Board Information.
XJTAG v4.3.0