Constants that change in Alternative Device Configurations
If a constant will always have the same value irrespective of how a device is used in a circuit, the simplest approach is to hardcode its value in the relevant XJEase file. For example, the page size of an I2C memory will never change and so can safely be hardcoded into the test device file. However, the same device may have an I2C address that is configured via its pins. In that case, the constant defining the address in the test device file may need a different value depending on how the device is connected in the circuit.
For those cases, it is best to set its value by using a Configuration Variable rather than hardcoding it. This provides an easy way for the constant to be given a different value for each use of the device in the circuit.
- The ability to use XJDeveloper to add Configuration Variables to your own files is found in XJTAG 3.9 or later.
To create a new Configuration Variable, select the Configuration Variables tab as shown in Figure 27 and click Add...:
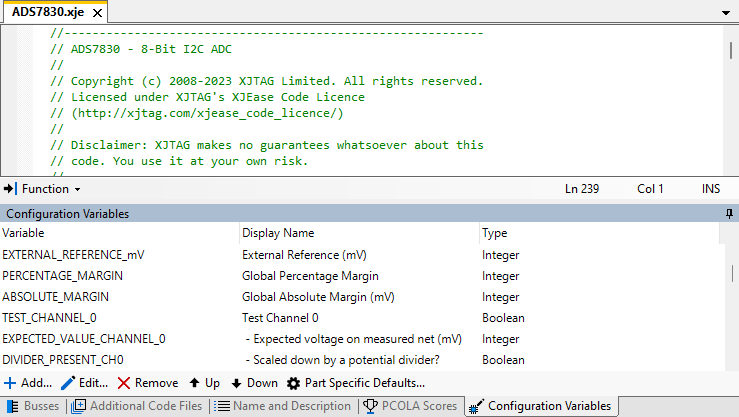
Figure 27: Adding a Configuration Variable
Clicking Add... opens the Add Configuration Variables dialog box:
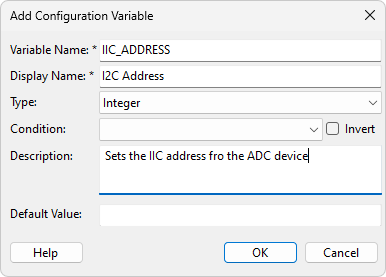
Figure 28: Setting Up a Configuration Variable
The fields in figure 28 are:
- Variable Name (1): the name that will be given to the constant for XJEase to use, so copy/paste that from code into the box.
- Display Name (2): enter a name to describe the constant being configured. This will be used to identify it in dialog boxes when the user is prompted to provide a value.
- Type (3): set the required type from the dropdown list as shown in the table below:
How the value is to be entered during device configuration Type required Notes Enter an integer into a box Integer Will allow an unsigned integer to be entered in either decimal format, hex (prefixed '0x'), or binary (prefixed '0b') Enter a simple text string into a box String The ability to enter a filename, with the option to browse folders Filename A Browse button will be placed beside the text entry box Use a tick box to switch a feature on or off Boolean Saved as a single-bit integer. Checking the box will set the variable to 1 and unchecking it will set the variable to 0 Select from a list of options that will set an integer variable Integer list Gives a menu of options to choose from as shown in Figure 29. See Using Lists for Configuration Variables below Select from a list of options that will set a string variable String list As Integer list but used for string variables. See Using Lists for Configuration Variables below - Condition (4): (optional) enter an expression to define the circumstances under which the user will be asked to set this Configuration Variable. For example, the XJEase code for a memory might include a Boolean that determines whether to perform programming at the end of the test. To avoid the user being asked to enter values for configuration variables related to programming when that step has been disabled, a conditional expression can be used.
- Description (5): (optional) a free text box for a description that will be displayed as a tool tip.
- Default Value (6): (optional) enter a Default Value if appropriate. A Default Value can be useful when the device has a configurable parameter that will normally be left at its default value but might need changing for some implementations. For example, an I2C device might be used with its default base address in most projects, but when a circuit uses several of the same device, extra configuration would be needed to provide the addresses for the additional ICs.
Using Lists for Configuration Values
Some variables can best be configured by selecting a value from a menu of options. For example, when configuring a memory, it may be necessary to choose one configuration from several alternatives. Rather than having to enter the variable for this directly, it would be simpler and less error-prone to ask the user to select one from a menu of descriptive options.
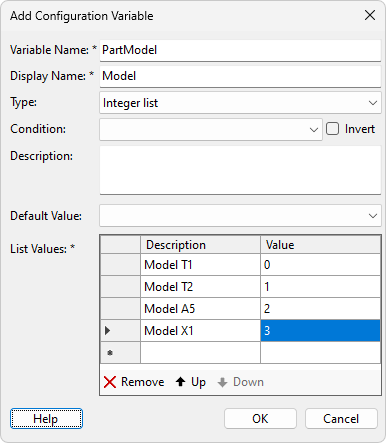
Two types of list can be created for Configuration Variables – one that sets an integer value and one that sets a string variable. In both cases, the process is as follows:
- Select a Type of either Integer list or String list from the dropdown menu as indicated in Figure 29 below.
- In the List Values box that appears, enter the descriptions you want as menu items when the device is configured. For each item, provide the value required for the constant.
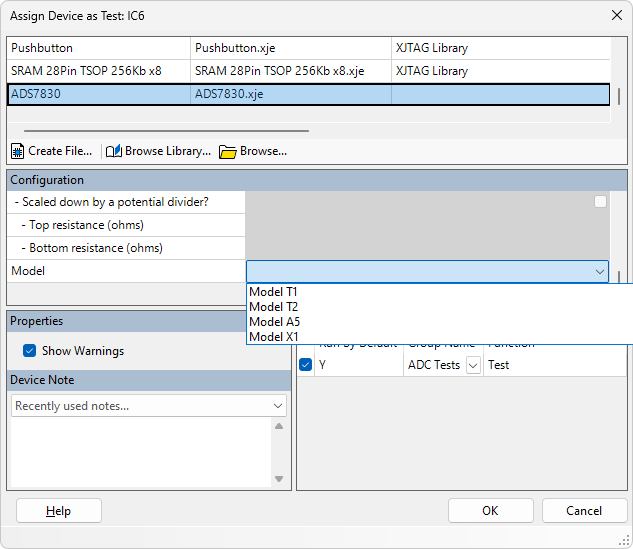
Figure 29 shows how the Description fields in the List Values entered for the Configuration Variable are presented in a pull-down menu when categorising the device:
|
|
Figure 29a: Adding Configuration Variable Options |
Figure 29b: Selecting Option when Configuring Test Device |
- For more details on adding a Configuration Variable, refer to the XJTAG Help system.
Entering Values for Configuration Variables
Now that the test device file has been given a Configuration Variable, a value can be set for each device that uses it. This means, for example, that in a circuit that uses several similarly-configured LEDs, the software can be told the colour of each one. This can be done in either the Categorise Devices screen or the Test Device Files screen: highlight the devices that use the same device file, right click, and select Edit Configuration... as shown in Figure 30.
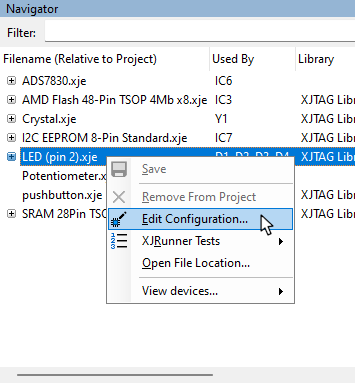
Figure 30: Configuring a Device in the Test Device Files Screen
If this is performed in the Test Device Files screen, it will open the Configure Device dialog box (Figure 31 below), into which the value(s) for all devices currently using that file can be entered. If it is being set while categorising devices, the Categorise Device as Test dialog box will be used, and the required value for the Configuration Value is entered as shown in Figure 32.
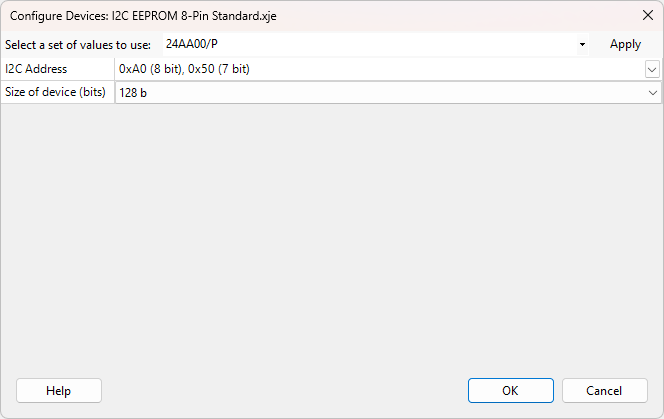
Figure 31: Setting a Configuration Variable via the Test Device Files Screen

Figure 32: Setting a Configuration Variable During Device Categorisation
- The text used to identify the variables comes from the Display Name that was provided when creating the Configuration Variable, and the tool tip comes from the Description field.
If multiple devices use the same file and are all being configured simultaneously, they will appear together in the dialog box as illustrated below in the example of Figure 33; this simplifies the allocation process.
If all the devices shown require the same value, it can be entered in the All column to save time.
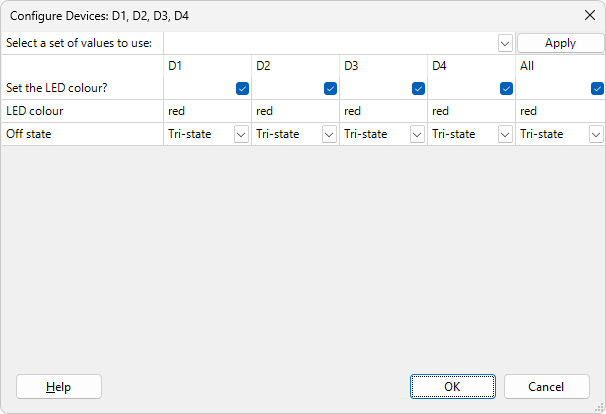
Figure 33: Configuring Multiple Devices That Use the Same Test Device File
XJTAG v4.3.0