Importing a Schematic
A searchable PDF schematic can be imported into XJDeveloper ready to help with actions like device and power-net categorisation, and to show circuit areas affected by errors found during testing. The software can then highlight the device or net on the schematic to allow the user to see its electrical function.
To import the file, click the  Add Schematic... button on the Add Board dialog box as shown in Figure 5 and navigate to the required file. If a schematic consists of a series of individual PDF sheets, multiple files can be selected in the navigation window.
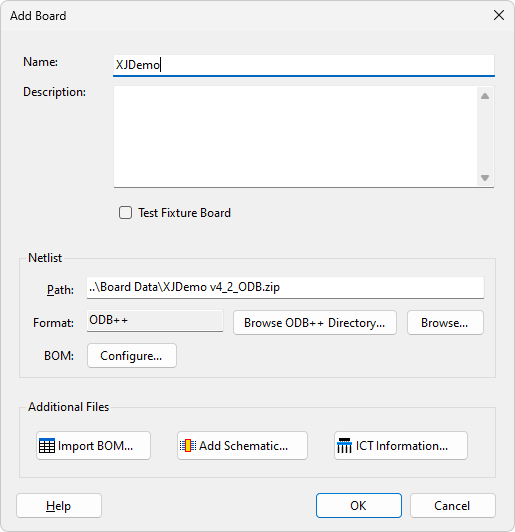
Figure 5: Adding a Schematic
Once the schematics have been selected, the Assign Schematic Files dialog box will appear (Figure 6 below), which will display the chosen filename(s). Further PDF files can be added using the  Add... button:
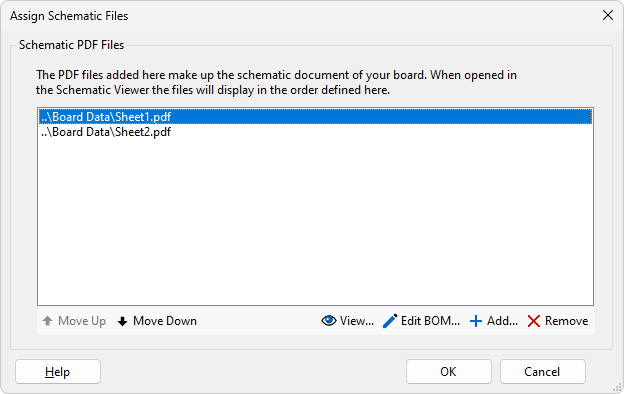
Figure 6: Using Multi-file Schematics
XJDeveloper’s schematic viewer will display the individual files as if they are a single document; the order they will be shown in can be changed if necessary using the Move Up and Move Down buttons.
To check the correct files have been selected, click the View... button shown in Figure 6 to view the schematics. Once it has been confirmed that the required files are all listed in the dialog box, click OK to import them.
Using a Schematic’s BOM Information
If the schematic contains metadata from which BOM information can be extracted, XJDeveloper will automatically offer the opportunity to use this data to populate its BOM fields when the schematic is imported. However, it is recommended that this is not done at this stage if an external BOM is available: it is best to import the BOM file first, and then to supplement it afterwards with information from other sources such as the schematic. The process of importing BOM data from the schematic is described later.
XJTAG v4.3.0