Main Window
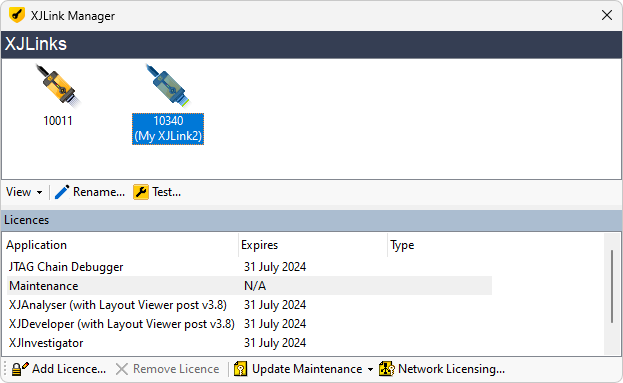
The main portion of the window displays the XJLinks currently attached to the system with their serial number displayed underneath. Selecting an XJLink displays a summary of the licences currently installed on that XJLink at the bottom of the window.
The View drop-down menu allows the main display to be toggled between an Icon view and a Detailed view, similar to Windows Explorer.
The  Rename button allows the name of the currently selected XJLink to be changed. The name of the XJLink is displayed in the Details view in the XJLink Manager and in XJRunner. It is stored inside the XJLink and so is the same on every machine the XJLink is plugged into.
The  Test button runs a series of tests on the XJLink2 to verify that it is working correctly.
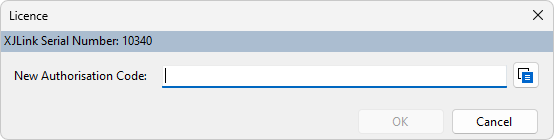
The  Add Licence button allows authorisation codes to be added to the XJLink. Clicking it displays a dialog into which the authorisation code can be entered. The
  Paste button on this dialog pastes the current contents of the clipboard into the box, which makes handling authorisation codes sent via e-mail easier.
The  Remove Licence button allows authorisation codes to be removed from the XJLink. Note that removing authorisation codes from your XJLink will typically prevent you from running the XJTAG software and is something that generally should only be done under the instruction of XJTAG Support.
The  Update Maintenance button allows a new maintenance file to be installed and is generally something that only needs to be done under instruction from XJTAG Support. There are two options when clicking this button:
- Download
- Clicking Download will automatically download the latest maintenance file from the XJTAG website and install it.
- From File...
- Click From File... to select a file that has been provided by XJTAG Support and install it.
The  Licence Settings... button opens the Licence Settings Dialog, where application-wide licensing can be configured.
The Bulk Licensing... button opens the Bulk XJLink Licensing dialog, which can be used when XJTAG has supplied you with a licence file containing licences for multiple XJLink units.
The About... button opens a dialog that displays information about the application.
XJTAG v4.3.0