Edit Image Dialog
An image layer can be added to the project. One use for this feature is to allow a photograph of the board to be added to the project, see the demo board for an example. The Edit Image Layer dialog allows an image layer to be positioned on the board before adding it to the project.
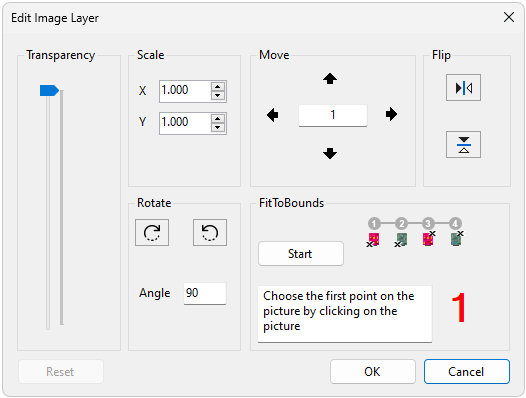
The Tranparency slider allows the image transparency to be adjusted.
The Scale numeric updown boxes allow the image to be scaled in the X or Y direction.
The Rotate buttons allow the image to be rotated clockwise or anticlockwise. The amount of rotation can be changed in the angle textbox.
The Move buttons allow fine adjustments to the image position. The amount that the image is moved by can be changed by updating the number in the textbox in the centre.
Fit to bounds allows the image to be fitted to the image bounds. Click the start button to begin the fitting process and follow the displayed instructions.
The Flip buttons allow the image to be flipped around the X or Y axis.
Reset resets the image to its original size and position.
OK closes the dialog, confirming the image layer and adding it to the current ODB project.
Cancel closes the dialog without making any changes to the ODB project.
XJTAG v4.1.100